Tuesday, November 3, 2020

Easy Shortbread


Making shortbread for your coffee break is easy, with only a few simple ingredients, and steps:

1. Mix one stick of softened non-salted butter with a pinch of salt, teaspoon of vanilla, and cup of sugar, which could be Splenda blend + confectioners for reduced sugar.

2. Mix in a cup of flour.

3. Turn into a ball on a floured surface.

4. Roll into a circle on parchment paper on a cookie sheet.

5. Press edges with fork, pierce decorative holes. Perhaps add walnut halves. Sprinkle with flavored sugar.

6. Press light wedge cuts with butter knife, then bake 22 minutes at 300F.

7. Remove and press deep wedge cuts with butter knife, then bake 10 minutes more at 300F.

8. Turn off oven and let sit in oven for one hour.

Done! Enjoy! You can customize how you want your shortbread shaped. These are firmer for dunking in coffee or tea.

Wednesday, September 23, 2020

Review: ICOM IC-Q7A - Unboxing, Widebanding, and Use


The ICOM IC-Q7A was one of the smallest handheld amateur radio transceivers of its time in the pre-millenial electronics age. Offering 2M and 70M milliwatt-level transmit, along with some wideband reception, the little HT was a lot of fun.

Initially.

I had one of these little buggers nearly 20 years ago after getting licensed; it was an impulse buy and was fun for a while but then i wanted an HT with more power out - i was also disappointed with the wideband receive, which did not include AM BCB... i sold it at a hamfest for a slight loss...  

Fast forward 20 years later: i recently purchased a new-in-the-box old-stock unit from a fellow on the evil Internet auction site; the Q7A was in its plastic, and came with antenna, clip, lanyard, charger and two corroded and unusable rechargeable batteries


Note the use of a silver foil seal - this is not something i've seen on any other HT boxes or even rigs for that matter (folks may want to comment). Perhaps to 'foil' tampering? LOL!


 I did know one thing, however. This HT came with rechargeable NiCads. What kind of shape do you think they may be in after sitting on a shelf for 20 years in storage?


Yep, you guessed it - corroded, somewhat exploded and unusable - who cares now that we have much better rechargeable AAs. It also means that I could confidently shit-can the included BC-127A/D recharger:


I like that a small 'cheat sheet' for the HT was included. I wish other manufacturers would do the same. Really, if you're going to develop a nice manual, why not do a little sheet at the same time - even if for download? There was also a regular manual (which you can still download from ICOM) in the box.

But ICOM could have saved some money by just including two AAs and no recharging gear with this milliwatt HT, IMHO.

Widebanding the IC-Q7A

I had forgotten how small, yet easy to use and program the Q7A is... and lo and behold, i also discovered that with a single mouse click, the HT could possibly be widebanded to receive BCB AM - if i had known this 20 years ago i would not have sold my original unit!

So i dug out an old Asus Eeepc w/Windoze 7 Starter out of the closet, and plugged in an FTDI 4-pole USB cable (any cable for the VX5 and VX3 will also work with the Q7A); after waiting 10 minutes for the cable and its drivers to install, i clicked on Goran Vlaski's 1999-vintage IC-Q7 Programming Utility (http://www.digital-laboratory.de/)... it ran - but horror of horrors, only offered COM1 thru COM4 ports, while the FTDI serial adapter came up as COM6... initially dismayed, i then edited the driver using Properties->Port Settings->Advanced->COM Port Number to an available port in range - voila!


Plugged in the Q7A, ran the programming utility, downloaded the HT's memory, and then with one mouse click on the 'SuperRX now' button (just above the Download button) the utility re-uploaded the memory and enabled reception down to 0MHz!

According to Vlaski in his README file, the IC-Q7A uses the same hardware and firmware as the ICOM R2 but was 'hobbled' by ICOM for some reason (as to not cannibalize R2 sales?)

His software apparently toggles an enabling bit or masks the transceiver's identity; and Vlaski's utility also provides an adjustment mode for the HT, used in conjunction with the Q7A's service manual (not for the faint of heart and unnecessary to me)

TIP: If you experience a problem re-uploading out-of-band programmed AM freqs between .5 and 30MHz, pull one end of a AA battery out of the HT within one second after seeing the 'Upload done' message in the utility - this sidesteps an error-checking routine programmed into the rig's firmware - nasty!

 Other software  you can use to conventionally program the IC-Q7A is Chirp (https://chirp.danplanet.com/projects/chirp/wiki/Home) and Bob Parnass' tk7 (http://parnass.com/tk7/).

So now my Q7A receives not only AM BCB, but also all SW bands (WWV, etc.); the change is retained between power on/off, and AM stations can be saved and retained in memory (i did those manually)

Fortunately you can still get a case that fits the Q7A - ICOM's LC146a, which has a cutout for the R5, but works FB (see title photo). A good alternative antenna for is the Diamond SRH519, but honestly i use a Comet SMA24 most often.


 I'm very happy that i have rediscovered my nice little pocket transceiver that now receives BCB AM, SW, airband, NOAA WX, VHF marine, BCB WFM, with transmit on 2M and 70M!


Sunday, August 23, 2020

MX-P50M HF Amplifier for FT-817, IC-703, Elad FDM DUO, Ten Tec Argonaut VI, Xiegu X5105, G90, and the Commradio CTX-10

 Overview of the MX-P50M

 This is just a quick listing of various rig-to-amplifier keying connections for the MX-P50M amplifier. I have searched far and wide for info on how to do this with my QRP rig collection, but have never seen all this info in one place. I hope this helps some folks out there. 

Others have written about this amp in more detail, but I thought I'd put together a page to help with answers on connecting the amp to a qrp rig.

Since the amp only has manual bandswitching, a simple ground-held connection keys the amp for transmissions. The amplifier comes in a nice extruded case. I have two of these amplifiers, both purchased used (one off Amazon believe it or not), and both put out the following roughly equal values using 1W input FM from my 818 using 13.4V. Values were measured using an MFJ-822 and dummy load:

  • 80M 15W
  • 40M 18W
  • (did not measure 30M)
  • 20M 20W
  • 17M 10W
  • 15M 18W
  • 12M 9W
  • 10M 4W

Most of these amps sold off the evil Internet auction site include a power cord and an 8-pin mini-DIN for connecting to the FT-817/8 ACC port. Hook up, as always, should be something like:

rig->amp->tuner->wattmeter->antenna

The normal procedure for using this amp with your QRP rig is:

  1. turn off the amp
  2. set your rig to 1W output
  3. either use a resonant antenna, adjust your antenna for resonance, or tune your antenna
  4. turn on amp 
  5. SELECT BAND ON AMP!!!
  6. key your rig

Just be careful that your tuner can handle the RF from the amplifier. I only want a bit more punch, so I only use 1W output from my rigs and look for about 20-25W output. The amp is capable of more output via higher voltages and RF, but I like to avoid heat issues and possible component damage.

Connecting the MX-P50M to a Yaesu FT-817/8

As most of these amps come with a cable, simply plug the mini-DIN into your 817/8's ACC port, then connect the two-pin wire to the amp. Polarization doesn't matter! 

If on the off-chance you did not get a cable for your Yazoo, you'll need an 8-pin mini-DIN for the ACC port. Connect GND and TX GND to the mini-DIN:


Here's my setup with an LDG Z11, which is a perfect match for this amp, as it can handle up to 60W, though as mentioned previously tuning is done at 1W with the amplifier off.

Connecting the MX-P50M to a Xiegu G106

The G106 is one of the newer QRP kids on the block. The great news is that if you have the CE-19 interface, you can easily connect your rig and the amp to work together. Simply run the mini-DIN to the interface and the ACC port on the G106, then use the PTT Con port to trigger the amp (pinout is printed on the CE-19 top label). See the X5105 section below, as it is similar. Setting the G106 to the mid-range power level provides 25-30W out on various bands.


Connecting the MX-P50M to an Elad FDM Duo

Connection for triggering the MX-P50M from an Elad Duo is just as easy as soldering the GND (sleeve) and PTT (tip) of a 3.5mm stereo plug to the two keying lines of the amp. 


Then insert the 3.5mm plug into the PTT out port on the back of the FDM Duo:


I set my FDM Duo to 2W output to get about 25W out on 40M. I have not run extensive tests yet, but will as some time in the future. Here's the setup with the amp, tuner, and FDM DUO (while listening to BCB MW):


Interestingly, the PTT on the ELAD also works quite well with a straight-thru stereo patch cable and the Xiegu XPA20 amplifer - no soldering or pin reconfiguration needed:


The XPA20 amplifier has low-pass filters installed for all bands except 6M and 160M, and one-half watt input from the ELAD puts out 10W out with 20W out using one watt input. A very nice little, albeit rare amplifier!

Connecting the MX-P50M to a Xiegu X5105

The X5105 and CE-19 make for a quick PTT connection for the amp. Amperage draw is ~6A @1W input. To connect the amp, use the CE-19 PTT port, and solder a 3.5mm stereo cable and plug with sleeve and ring connection per the diagram on the top of the CE-19. Then connect the X5105 port of the CE-19 to the X5105's ACC port. Turn off your X5105's tuner!


The X5105's SWR sweep function is especially handy with the Z11 tuner, as you can 'fine tune' using the tuner's inductor and capitance switches and watch changes to SWR in real time. Once your SWR is satisfactory, turn on your amp, first making sure that the proper band is selected, and then fire away!


Connecting the MX-P50M to a Xiegu G90

 Connection is exactly the same as for the X5015 since the two rigs use the CE-19. Make sure to turn off your G90's tuner.  If you want more output than the G90's 20W, use 2W or 3W input to the amp - NOT 20W!!!!

Connecting the MX-P50M to an ICOM IC-703

Apparently it is a pain in the ass to hook up an amplifier to the IC-703 without PTT isolation, separate circuity and custom cabling. The easiest way to accomplish this may be to buy one of W2ENY's IC-703 amplifier keying cables, which has the transistors and other components inside the hood of the 13-pin DIN ACC plug for the back of the IC-703. I may buy one at some point, but since I don't use the IC-703 in the shack and since the rig works fine at 10W for /P, i may not.

Connecting the MX-P50M to a Commradio CTX-10

 The Commradio CTX-10 is one of the newest QRP kids on the block. It has 1-, 5-, and 10-W output and an internal tuner (which should not be used!). To connect the amp to the CTX-10, connect either end of the amp's keying lines to pin 2 and pin 6 of the CTX-10 6-pin mini-DIN accessory port:


Tuesday, January 28, 2020

Colt Agent - First Issue

The Colt Agent First Issue

I like snubbies. A lot. So I have a few. Here's one I found recently in a LGS where I buy my reman ammo:


Much has been written about these revolvers, so I won't regurgitate published facts. My example traces to 1967 manufacture, so it is in the First Issue generation. Alloy frame, steel barrel, cylinder, etc. Leaf hammer springs.

The bonus is that it came with a set of Tyler T-Grips. What boggles my mind is that these are so good and inexpensive, yet the maker seems to limit availability - you can't order them on-line (links no good), and you have to fill out an order form and wait many weeks for your own!

Anyhow, I really like the Agent's weight (15oz unloaded, only 1 oz more than a S&W 637-1), and extra capacity: 6 vs 5 rounds - a definite advantage in my book. I load my first chamber on my snubbies with a CCI Big 4 shotshell - 81gr, #4 shot - i figure i'll have a better chance of running into a rattlesnake, water moccasin, coral snake or nasty dog vs a bad guy.

Saturday, October 19, 2019

Review of the Dead Air Odessa-9 Suppressor

The Dead Air Odessa-9 Suppressor


In the spring of 2019 my LGS shooting club had a presentation by the southeast Dead Air rep. He came with a variety of weapons and suppressors. I liked all of them and it was a good chance to shoot some very unique and powerful weapons with a suppressor.

But I'm a small-caliber dude, so my guns are 9mm, .357, .38SPL, .380ACP, .32ACP, and rimfire (.22LR and .22WMR). One Dead Air suppressor caught my eye for several reasons:

1. Quality Build (like all Dead Airs) - stainless with locking threads

2. Versatility (modularity) - 11 sections for tuning your level of suppression

3. Packaging - comes in a nice heavy-duty plastic box with sectioned compartments and tools

4. Versatility (range of calibers) - everything from .17HMR to 9mm - this was a major reason for my purchase... i do have a Kel-Tec Sub-2000 in 9mm (not a great carbine IMHO, but that's another story).

So I bought one via a Silencer Shop kiosk - a one-stop shopping for all paperwork including fingerprinting and photowork.

And imagine my surprise when my tax stamp came through in less than 90 days:


I have an FN Browning Hi-Power, purchased new in 1985, so i purchased an Alpha Wolf threaded stainless barrel and paired it with my new suppressor (as shown above).

I am very pleased with my Odessa-9. It is a keeper!


Tuesday, October 15, 2019

Smith and Wesson Model 60 and Model 637

Review of the Smith and Wesson Model 60 (no dash) and Model 637-1 (no lock)


I recently ran across a pack of snubbies for sale at my local reman ammo manufacturer. Two of them caught my eye, so I bought one and brought it home with me (along with a 1,000 rounds of .38SPL 142gr JHP for $200). This page is my overview and observations regarding these two revolvers, the Model 60 no dash and the Model 637-1; much has been written about them and other Smiths, so I'll pass on the specs, and will only point out what I've learned and some of the highlights.

I hope this info will help some fellow shooters who may be new to snubby revolvers. My feeling is that while the era of polymer-framed semi-autos has made pistols for self-defense or recreational shooting very popular and more affordable nowadays, there may be some resurgence in single- and double-action revolver shooting and carry, and more interest in old-school, vintage designs (Rugers notwithstanding, which are totally different from Smiths):
 

The Model 60 No Dash


Here are two reasons I like the Model 60: all-stainless construction and fewer internal parts due to no insipid internal lock:


The model number is stamped inside the crane, while the serial number is stamped on the butt. Note that there is no dash to indicate a change in manufacturing or specs. My Model 60 dates to a year of 1984 or 1985 manufacture. It is a fine example of a stainless version of the Smith Model 36:


Here is the right side of the barrel, which is not pinned. Note that I've slapped some fluorescent lime paint on the front sight's ramp using a Wally World fabric pen:


Here is the origin and manufacturer info; the four lines was later changed to a simpler two-lines the next model or so (I forget when). The screw shown next to the text is used to enable removal of the crane/cylinder for cleaning:


Note the hammer contains the firing pin:


All Smiths since 1945 have a hammer block (there are also internal mechanisms, such as the rebound slide). This means you can carry this revolver fully loaded:


There is a downside to the Model 60: It weighs nearly a pound and half unloaded (although only two ounces more than a current-product Charter Undercover revolver, which is also stainless with the same capacity). This means that the 60 is a bit outside my comfort zone for pocket carry, as I don't want to look like a gang-banging homey with droopy drawers. My 60 came with these Pachmayr grips, along with the original wood grips, so I may do a re-weighing with the wood grips:


Cleaning Tips


Cleaning a Smith revolver is usually quite simple: empty the weapon, unscrew a frame screw located on the right side of the frame below the cylinder, then unlatch and slide the crane forward and separate the cylinder from the crane. Scrub away to your heart's content using some CLP and a nylon bore brush and let sit for a bit before swabbing and polishing clean.

The Model 637-1


 I was also fortunate to find a Model 637 on the same day as the Model 60. Of course I immediately purchased the Model 60, but then, after some thought, went back a day or so later and purchased this Airweight:


And again, you can see why I like this 637:


More important, this 637 is also a 637-1:


The 637 also came with a Master Lock gun lock, which AFAIK was only done for one year: 1997. The -1 attached to the model number also denotes that this revolver was the first in a line of +P capable Airweight revolvers, even though not marked as such on the barrel, and does not have a pinned barrel. (I believe Smith stopped using pinned barrels in 1982.) There is some debate, but some folks surmise that incorrect torque on barrel installation at the factory led to premature frame failure on some of these alloy-framed revolvers. I detected no crack on the underside of the frame by the chamber.

Where to Check for a Cracked Airweight Frame


Here is a picture of a cracked Airweight frame, albeit on a Smith 442; there is a picture of a cracked 638 frame on-line as well - but this is the area to check out if you are examining an Airweight for purchase. Some folks blame overuse of +P ammo, while others blame alloy defects and/or machining:


 A reputable LGS will not sell you a used Airweight with a damaged frame. However, I'd be wary of any pawn shop fare. Always carefully example any used weapon before purchase!

Here's the left side of my 637's barrel:


And also note that there is nothing on the right side of the barrel:


This 637's serial number denotes a 1997 manufacture - just in time before Smith's sell-out to the Federal government. I think Smith revolvers with no internal lock are going to become more desirable; many collectors and/or shooters do not want revolver models with an internal lock. Other revolver lines with internal locks includes all Taurus models - a company with terrible customer service that does not sell any parts to owners - and many post-1997 Smiths.

Again, lettering was changed to two lines in the next year:


This 637 has a flat-faced hammer with a frame-mounted pin. Note the hammer block (which is not a transfer bar, such as that used in Ruger revolvers!):


This 637 is destined for pocket carry. It is compact, fits inside a Grovtec holster and weighs only 13-and-a-half ounces unloaded:


This is quite a bit lighter than the Model 60, so the 637 is going to work for me!

Range Report for the Model 60


Went to the range and ran 75 rounds of some locally fabricated reman ammo in .38SPL 142gr FMJ:


Ignoring the 5 o'clock flyer, I think the 60 ran pretty well in double action. This is the way these snubbies should be shot IMHO, although the single-action pull was much lighter.

Pull Weights for the Model 60


Using my trusty stainless 15-lb fish scale, I measured the following pull weights for my Model 60:

double-action: 14 lbs
single-action: 4.5 lbs

There is room for improvement here. It may also indicate that either the previous owner did not shoot the revolver much or had stronger hammer and/or rebound slide springs installed. I have not opened up the revolver, but may take a quick look to see if some lubrication is needed. I don't think I want to mess with the action just yet.

Range Report for the Model 637


Here is a range pic of the first 15 rounds through my new [old] 637. Quite accurate to POA for my needs, and I was pleased to discover that recoil was not a problem whatsoever (of course, I could be used to double-action and .357 loads in my Ruger SP101s).


Pull Weights for the Model 637-1


Again using my fish scale, I measured the following pull weights for my Model 637-1:

double-action: 11.5 lbs
single-action: 4 lbs

As you can see, this Smith - which appeared to have little use at all - has significantly lighter pulls than the Model 60. I don't think I'll venture to make any improvements on this revolver's action.

Summary 


I am very pleased to be a new owner of these modern, yet older pre-lock Smiths. They are keepers, and won't be sold or traded in my lifetime. I may also be on the lookout for similar Smiths, such as the 642. Smith and Wesson does make no-lock variants of these double-action only revolvers, but I would prefer to find a used one in good shape. This may prove difficult if the popularity of wheelguns continues to grow. And I would really like to see a resurgence of cowboy action shooting!


Tuesday, September 24, 2019

Review of Ruger Shopkeeper

Tips, Traps, and Tricks of the Ruger New Bearcat Shopkeeper


It looks like I've come full-circle on my range shooting nowadays. First started out with small-caliber polymer-framed pistols, Zamak Saturday Night Specials, tiny stainless hideaways, folding pistols with arm braces, and takedown rifles.

Then I was bitten by the wheelgun bug. There's something about wheelguns that I like. The simplicity. The convenience. The one-on-one challenge for accuracy. The zen of loading, shooting, cleaning, and maintenance. The ability to personalize in style, fit and carry.

And now I own my very first single-action pistol. Kinda backwards, huh? Anyhow, I'm very happy with my new revolver: The Ruger New Bearcat Shopkeeper, a Lipsey 3" barreled stainless model.

First Impressions


One thing I've noticed is that in most on-line reviews, pictures of the ejector rod's half-moon finger piece show the finger piece moving all the way to the rear.

This originally couldn't happen on my Shopkeeper, as the ejector rod spring would not compress enough:


Better Ejection with Ejector Factory Spring Replacement


One fellow gunslinger on RFC suggested that an ejector spring for a 4" Bearcat had been installed. I subsequently ordered one ($10+s/h) and then compared it to the installed spring. Nope, my Bearcat came from the factory with a 'purportedly' shorter spring. Here is the original spring as installed (the replacement was 4"):


So I subsequently removed the shorter factory spring, put it away in the Ruger case for safekeeping, then clipped and installed a shortened replacement spring:


The original spring only allowed clearance as shown here:


The result of installing the clipped replacement spring is that the business end of the ejector rod protrudes one-eighth of an inch more out of the cylinder chamber. This makes for more efficient ejecting of empties with no modification of the ejector housing or use of a modified ejector rod:


My ejector rod's end is slightly beveled all around, not sharp-edged. I was initially worried about how it would work but went to the range for an initial fit and function, and ran 120 rounds of assorted ammo. 

My Shopkeeper was flawless. I was even able to achieve a small bit of accuracy right off the bat - but make no mistake: shooting a single-action revolver with a short barrel and iron sights is a challenge.

Best ammo was CCI Minimags for accuracy. Opening the gate, putting the wheelgun into half-cock, then rotating the cylinder to have the rod slide along the trailing edge of each cylinder chamber worked just fine for extraction, and I was soon zipping empties onto the bench top.

There are some nice touches here, such as the laser-engraved cylinder. I think it's funny that some folks are paying gunsmiths to remove these 'rollmarks':


The Shopkeeper even comes with a handy finger-slicer built in - LOL! Of course the secret to not hurting your fingers is to properly hold the gun for extraction. I open the gate, put the gun into half-cock, then hold the gun in my left hand, turning the cylinder while at the same time pressing down the extractor with my index fingernail (making sure that the muzzle is, always, pointed down range).

TIP: You don't even need to look at your Shopkeeper while using the ejector. Place the hammer in half-cock, open the gate, then rotate the cylinder until you feel a 'click'; this indicates you're all set to eject, and the ejector rod will be in the right place alongside the trailing chamber wall to catch the lip of the empty case. Try it!

If you get the hang of it, you'll soon be handling your Shopkeeper safely like a long-time pro:


One tip: always ensure that your cylinder pin is firmly and properly seated. This will avoid any problems with alignment:


One thing I always seem to do on all my guns with iron sights is to deploy a daub of fluorescent lime-green acrylic paint from my $2 Wally World paint pen (found in the fabric section):


If you're interested in the Shopkeeper, but worried about all the problematic reports (most of which seem to center around the 2013 time-frame concerning cylinder chamber diameter, or OCD owners disappointed with grip sizing and fit) - don't worry! Ruger will make things right for any problem with your plinker, but there is little to go wrong with this single-action. You may find a timing mark on the cylinder face, and a factory smith is required to fit the action before the gun leaves the factory.

Important ShopKeeper Tips, Tricks, and Traps - How to Avoid Lockup


I found no problems with my Shopkeeper. Here are a few tips, tricks and traps I've learned as a new single-action rimfire wheelgun owner:

1. Read the manual! This is essential if you want to use your new gun properly.

2. In particular, pay attention to the proper COCKING! Here's the relevant info from the manual, found on page 15:


And not only will the cylinder be out of index, but you may experience the dreaded 'lock up,' that some folks complain about! I have found that you can indeed lock up the action if you do not ease the hammer forward. You can do this from the half-cock and loading or unloading:

- after the gate is closed, ensure the cylinder is rotated counter-clockwise
- pull back slightly on the hammer while at the same time very slightly pulling back on the trigger
- when you feel the hammer release, take your finger off the trigger and ease the hammer forward

3. You can also experience a slight 'lock up' if your cylinder chambers get too dirty while shooting. This can happen at any point, especially if using lousy ammo, like Federal bulk or American Eagle (in the 40-round boxes). If you want to pretend you're shooting black-powder revolvers, fine, but this shit is simply awful:


What happens is that you'll be unable to fully seat the rimfire cartridges, and the rotation of the cylinder will be impinged by the outsized cases. You can also run into seating problems by first shooting shorts or longs, then switching to long-rifle ammo.

TIP: Take a small bore brush with you and clean out your cylinder chambers somewhat to continue shooting. And try not to mix ammo types during extended (100-round+) range sessions.

4. If by the off-chance that you do experience lock-up, you will need to remove the cylinder by depressing the latch button and extracting the cylinder rod. BE CAREFUL IF YOU HAVE AMMO IN THE CHAMBERS!

Your Shopkeeper Holster


I like to have a Ruger holster for each of my Ruger wheelguns. The sky is the limit if you want a good holster for your Shopkeeper. Prices range from all the way on the low end for a nylon waistband version all the way up to a custom Western-style leather.

The middle ground for quality and fit for me is a Triple K holster.  Ruger's version is a Triple K:


This is similar to my other Ruger holsters for my SP101s. Unfortunately, Ruger does not offer a holster specifically for the 3" barrel Shopkeeper. The good news is that there is a much-better fitting and more appropriate Western-style holster available at a reasonable price-point: the Triple K #675:


This holster is a great match for this little single-action. You may not be a fan of the leather thong strap for securing the hammer, but it works fine for me:


I hope you enjoy your Shopkeeper. I have now put more than 500 700 rounds through the gun and enjoy shooting it. Here's a recent range pic using three cylinders of CCI Mini-mags:


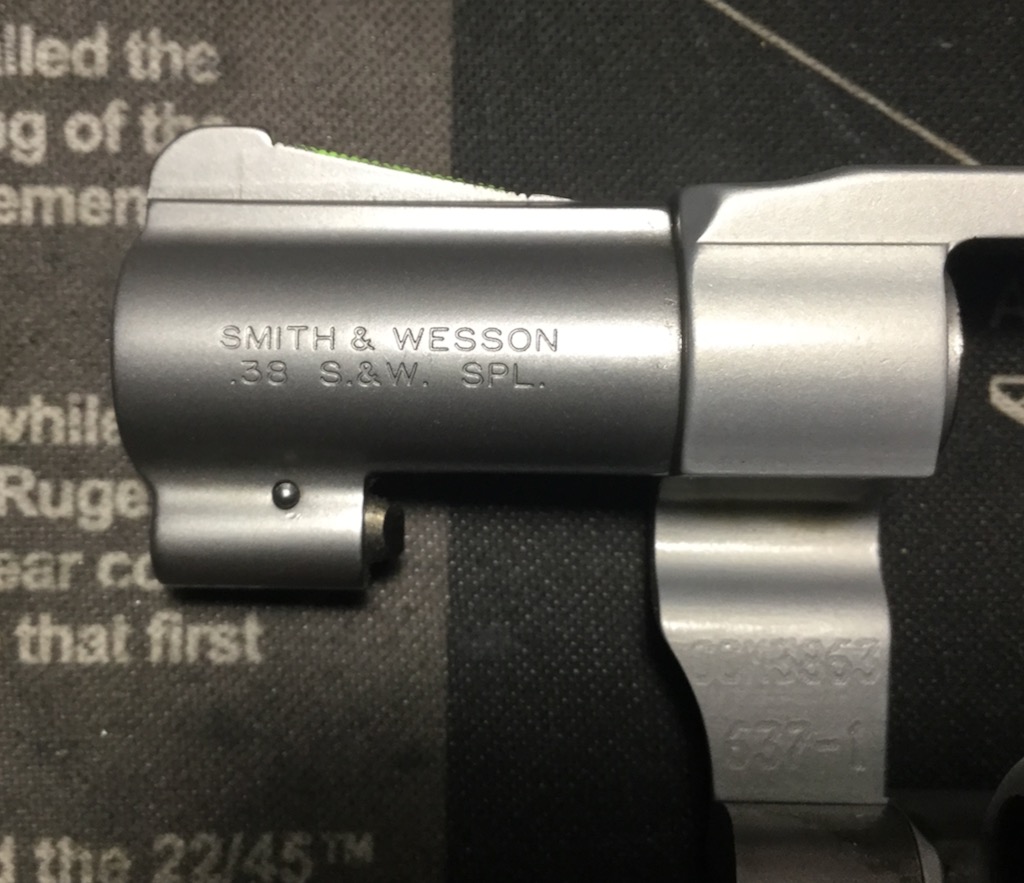
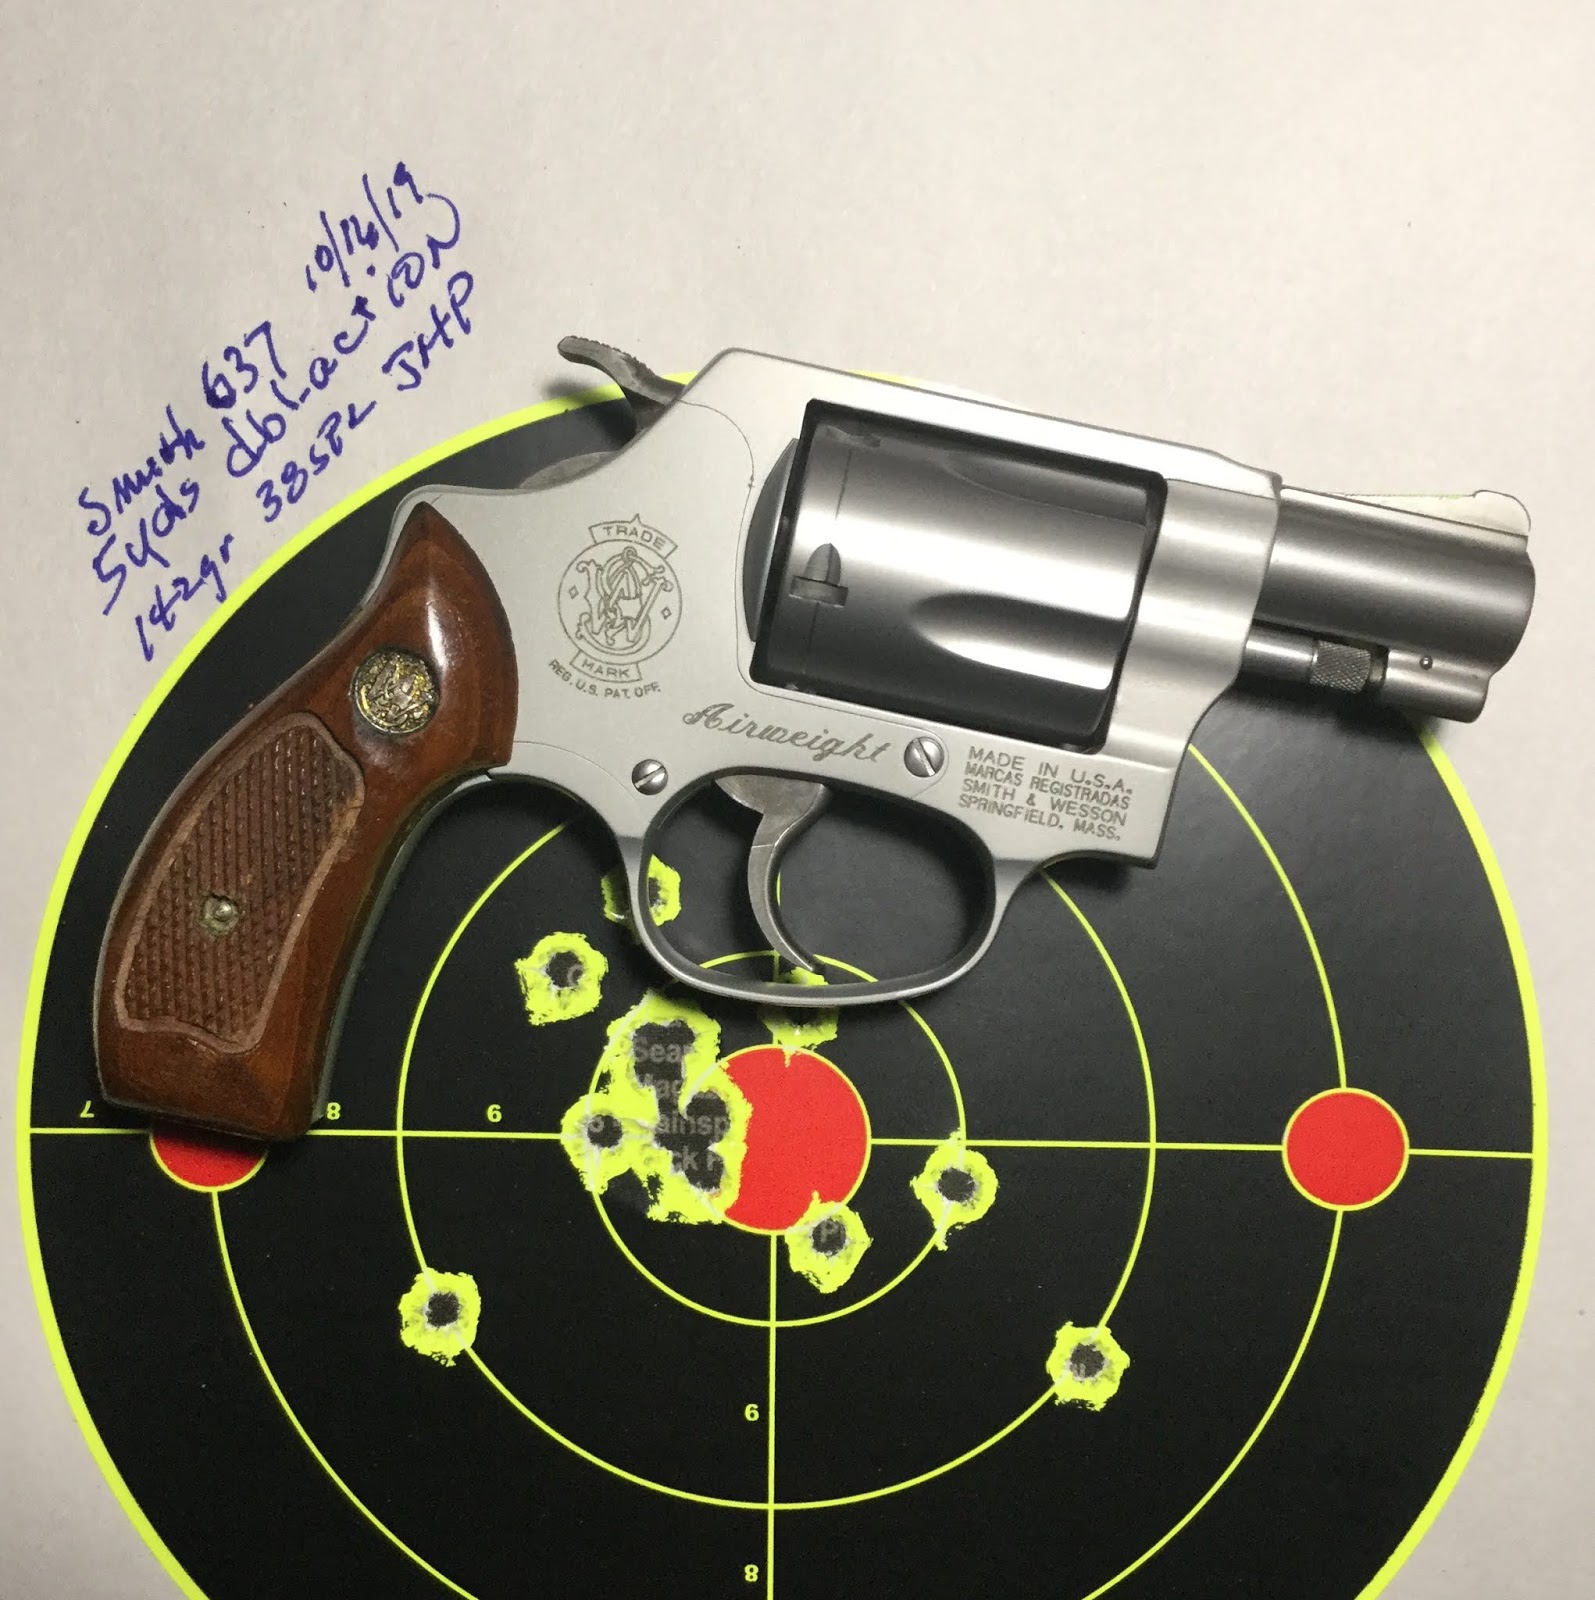
It's a nice companion to my small 100+ year-old Smith and Wesson Safety Hammerless:


here's a range pic w/a new(old 2013) Bearcat in a shoot-out:


Tips for Shooting the Ruger Shopkeeper (and most short-barrel single-actions)


I was somewhat frustrated when I first started shooting my Shopkeeper. I though there must be something wrong with the revolver, as I was getting inconsistent groupings, flyers, and bullets didn't seem to be hitting to point of aim.

I blamed the gun: it was the timing; it was the chambering; it was the cylinder gap; and it was the sights (I kept shooting to the left).

But I was wrong: It was me. All me.

Finally, after more than two bricks of various ammo, I went to the range and set up 4" bulls at 15 feet. Standing steady with a firm grip on the Shopkeeper, I aimed at the bulls with the sights lined up underneath the bullseyes with both eyes open, and slowly squeezed the cocked trigger, making absolutely sure to pull straight back.

Suddenly my little revolver was hitting where I wanted it to! Here's a pic of the range session (Nov. 14, 2019). I used the cheapest rimfire .22LR I had on hand: $0.03/round Aguila Super Extra:


I think I'm finally getting a handle on single-action iron-sight shooting with my Shopkeeper.

It's a [Shop]keeper for sure!